
DIY Excavator Maintenance: Empowering Owners with At-Home Care
Excavators, the powerful workhorses of countless industries, represent a significant investment. While complex repairs and in-depth diagnostics often necessitate the expertise of certified technicians, proactive owners can and should undertake a range of essential maintenance tasks themselves. This "do-it-yourself" (DIY) approach not only saves on service costs but also fosters a deeper understanding of the machine's operation, allowing for early detection of potential issues and contributing significantly to the excavator's longevity, safety, and overall efficiency. This technical article outlines a comprehensive guide to DIY excavator maintenance, detailing the tasks owners can confidently perform at home or on-site with basic tools and a commitment to safety and manufacturer guidelines.
The Benefits of DIY Excavator Maintenance:
Embracing DIY maintenance offers several key advantages for excavator owners:
Cost Savings: Regularly scheduled professional servicing can accumulate significant expenses. Performing routine tasks yourself directly reduces these labor costs.
Early Issue Detection: Frequent hands-on interaction with your machine allows you to become intimately familiar with its normal operation. This heightened awareness makes it easier to identify subtle changes in sounds, vibrations, or fluid levels that could indicate developing problems.
Increased Uptime: Proactive maintenance helps prevent minor issues from escalating into major breakdowns that lead to costly downtime and project delays.
Extended Equipment Lifespan: Consistent care and attention to basic maintenance tasks contribute significantly to the overall health and longevity of your excavator, maximizing your investment.
Enhanced Safety: Regular checks on critical safety components ensure they are functioning correctly, contributing to a safer operating environment.
Empowerment and Understanding: Taking an active role in your excavator's maintenance provides a deeper understanding of its systems and how they interact, making you a more informed owner and operator.
Essential Safety Precautions:
Before undertaking any DIY maintenance on your excavator, prioritizing safety is paramount. Always adhere to the following guidelines:
Consult the Operator's Manual: This is your primary resource for specific maintenance procedures, recommended lubricants, and safety precautions for your particular excavator model.
Wear Appropriate Personal Protective Equipment (PPE): This includes safety glasses, gloves, sturdy work boots, and hearing protection as needed.
Ensure the Excavator is Stable and Secure: Park the excavator on a level surface, engage the parking brake, and lower the bucket or attachment to the ground. For tasks requiring access underneath, use appropriate blocking or supports rated for the machine's weight. Never rely on hydraulic cylinders alone to support the machine.
Disconnect the Battery: Before working on electrical components or any task where accidental movement could occur, disconnect the negative battery terminal to prevent electrical shock or unintended operation.
Relieve Hydraulic Pressure: Before disconnecting any hydraulic lines or components, consult your operator's manual for the correct procedure to relieve pressure from the hydraulic system. Trapped hydraulic fluid can be under immense pressure and pose a serious hazard.
Use the Right Tools: Employ the correct tools for each task to prevent damage to the machine and ensure your safety.
Work in a Well-Ventilated Area: If your maintenance involves handling fluids or chemicals that emit fumes, ensure you are working in a well-ventilated space.
Never Work Alone: It's always advisable to have another person nearby in case of an emergency.
If Unsure, Seek Professional Help: If you are uncomfortable or uncertain about any maintenance task, do not attempt it. Contact a qualified technician.
DIY Excavator Maintenance Tasks:
With safety as the top priority, here are several essential maintenance tasks that excavator owners can typically perform themselves:
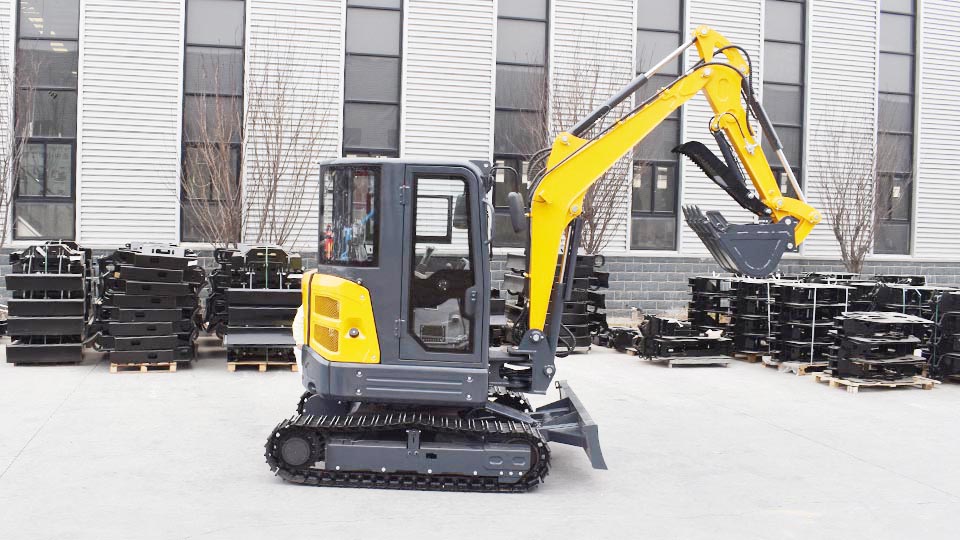
1. Daily Pre-Operation Checks (Walk-Around Inspection):
This is the most crucial DIY task and should be performed before operating the excavator each day. It involves a visual and functional check of key components:
Fluid Levels:
Hydraulic Fluid: Check the level in the reservoir, ensuring it is within the specified range. Look for any signs of leaks around hoses, fittings, and cylinders.
Engine Oil: Check the oil level using the dipstick and top up as needed with the manufacturer-recommended oil. Inspect for leaks around the engine.
Coolant: Check the coolant level in the radiator or expansion tank. Ensure it is within the specified range. Inspect for leaks around hoses and the radiator.
Fuel: Check the fuel level and ensure it is sufficient for the day's work. Inspect for leaks around the fuel tank and lines.
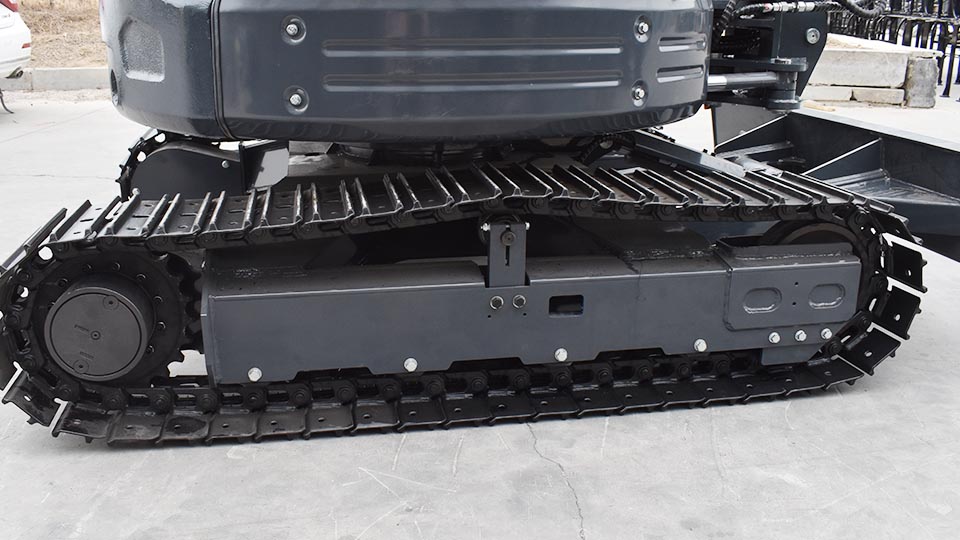
Undercarriage:
Track Tension: Visually inspect the track sag. Consult your operator's manual for the correct tension and adjust if necessary (this often involves a grease cylinder).
Track Condition: Look for damaged or missing track shoes, loose or worn links, and excessive wear on bushings and pins.
Rollers and Idlers: Visually inspect for leaks, damage, and ensure they rotate freely.
Sprockets: Check sprocket teeth for excessive wear or damage.
Hydraulic System:
Hoses and Fittings: Visually inspect all hydraulic hoses and fittings for leaks, cracks, abrasions, and bulges.
Cylinders: Check cylinder rods for dents, scratches, and leaks around the seals.
Operator Cab and Controls:
Seat and Seatbelt: Ensure the seat is in good condition and the seatbelt is functional.
Controls: Check the smooth and proper operation of all levers, pedals, and switches.
Gauges and Indicators: Verify that all gauges and warning lights are functioning correctly.
Visibility: Ensure clear visibility through windows and mirrors. Clean if necessary.
Safety Devices: Briefly check the functionality of the horn and any other audible or visual warning devices.
Boom, Arm, and Bucket:
Structural Integrity: Visually inspect for any obvious cracks, bends, or damage.
Pins and Bushings: Check for excessive wear or looseness.
Bucket Teeth: Inspect for wear or damage and ensure they are securely attached.
Electrical System:
Lights: Check the functionality of headlights, work lights, and any signal lights.
Wiring: Visually inspect for any damaged or exposed wires.
2. Regular Lubrication:
Proper lubrication is critical for reducing friction and wear on moving parts, extending component life, and ensuring smooth operation. Consult your operator's manual for specific lubrication points and recommended lubricants. Common lubrication points include:
Boom and Arm Linkages: Grease pins and bushings at specified intervals.
Bucket Pins and Bushings: Lubricate regularly to prevent wear.
Swing Bearing: Apply grease to the swing bearing as recommended.
Travel Motors and Final Drives: Check and top up lubricant levels as specified.
Use a grease gun with the correct type of grease and apply the recommended amount at each lubrication point. Wipe away any excess grease after lubrication.
3. Filter Maintenance:
Filters are essential for protecting the excavator's vital systems from contaminants. DIY filter maintenance includes:
Visual Inspection: Regularly inspect air filters, fuel filters, and hydraulic filters for dirt buildup or damage.
Air Filter Cleaning (if applicable): Some dry-type air filters can be cleaned by gently tapping out loose dirt or blowing compressed air from the inside out. Consult your manual for specific cleaning instructions and replacement intervals.
Replacement: Replace all filters (air, fuel, hydraulic, oil) at the manufacturer-recommended intervals. Ensure you use the correct replacement filters for your excavator model. When replacing filters, inspect the old filters for any signs of excessive contamination or debris, which could indicate a larger problem.
4. Fluid Level Adjustments:
As part of your regular checks, you may need to top up fluid levels:
Hydraulic Fluid: Use only the manufacturer-recommended hydraulic fluid. Ensure the system is clean when adding fluid.
Engine Oil: Use the correct grade and type of engine oil as specified in your manual.
Coolant: Use the recommended coolant mixture.
Fuel: Ensure you are using the correct type of fuel and avoid running the tank completely dry.
5. Cleaning and General Upkeep:
Keeping your excavator clean not only improves its appearance but also allows for easier inspection and prevents the buildup of debris that can cause damage or impede operation:
Regular Washing: Wash the excavator periodically to remove dirt, mud, and other debris. Pay attention to the undercarriage, cooling system components, and around hydraulic cylinders.
Debris Removal: Regularly remove any accumulated debris from around the engine, hydraulic components, and tracks.
Cab Cleaning: Keep the operator cab clean for better visibility and operator comfort.
6. Simple Component Adjustments:
Some minor adjustments can often be performed by the owner:
Track Tension Adjustment: As mentioned earlier, adjusting track tension is a routine maintenance task. Familiarize yourself with the procedure outlined in your operator's manual.
Mirror Adjustments: Ensure mirrors are properly adjusted for optimal visibility.
Seat Adjustments: Maintain proper seat adjustments for operator comfort and control.
Tasks Best Left to Professionals:
While DIY maintenance offers numerous benefits, certain tasks require specialized knowledge, tools, and safety precautions and should always be performed by qualified technicians:
Major Hydraulic Repairs: Repairing or replacing hydraulic pumps, motors, cylinders, or complex valve assemblies.
Engine Overhauls or Major Repairs: Internal engine work requires specialized tools and expertise.
Electrical System Diagnostics and Repairs: Troubleshooting and repairing complex electrical issues, especially those involving the ECU or sensors.
Undercarriage Component Replacement: Replacing track chains, rollers, idlers, or sprockets often requires specialized lifting equipment and tools.
Welding or Structural Repairs: Any welding or repairs to the excavator's structural components must be performed by certified welders.
Calibration and System Adjustments: Adjusting hydraulic pressures, engine timing, or electronic control system parameters requires specialized diagnostic equipment and knowledge.
Developing a DIY Maintenance Schedule:
To ensure consistent and effective DIY maintenance, establish a schedule based on your excavator's operating hours and the manufacturer's recommendations. This schedule should include:
Daily: Pre-operation walk-around inspection.
Weekly (or as specified): Lubrication of key points, thorough visual inspection, fluid level checks.
Monthly (or as specified): Filter inspections, more detailed cleaning, track tension adjustment checks.
Hourly Intervals (as per manual): More in-depth checks and potential replacements of certain filters or fluids.
Keep a maintenance log to record all inspections and tasks performed, along with the dates and any findings. This helps track maintenance history and identify potential recurring issues.
Conclusion:
Empowering yourself with the knowledge and skills to perform basic DIY excavator maintenance offers significant advantages in terms of cost savings, early issue detection, and equipment longevity. By diligently performing daily pre-operation checks, regular lubrication, filter maintenance, fluid level adjustments, and general cleaning, owners can play a crucial role in keeping their excavators operating safely and efficiently. However, it is equally important to recognize the limitations of DIY maintenance and to entrust complex repairs and diagnostics to qualified professionals. By striking a balance between at-home care and professional servicing, excavator owners can maximize their investment, ensure the safety of their operations, and keep their powerful machines working reliably for years to come. Always remember to prioritize safety and consult your operator's manual as your primary guide for all maintenance procedures.
Post time:Sep-25-2020
