
How to Operate a Mini Excavator: A Comprehensive Technical Guide
Operating a mini excavator, also known as a compact excavator, requires a blend of technical understanding, practical skill, and a strong commitment to safety. These versatile machines are invaluable on construction sites, for landscaping projects, utility work, and more. While seemingly intuitive to some, proper operation involves mastering controls, understanding machine dynamics, and adhering to strict safety protocols to maximize efficiency and prevent accidents. This comprehensive technical guide will walk you through the essential steps and considerations for effectively operating a mini excavator.
Understanding Your Mini Excavator
Before even thinking about starting the engine, it's crucial to familiarize yourself with the specific model you'll be operating. Mini excavators come in various sizes and configurations, but generally share core components:
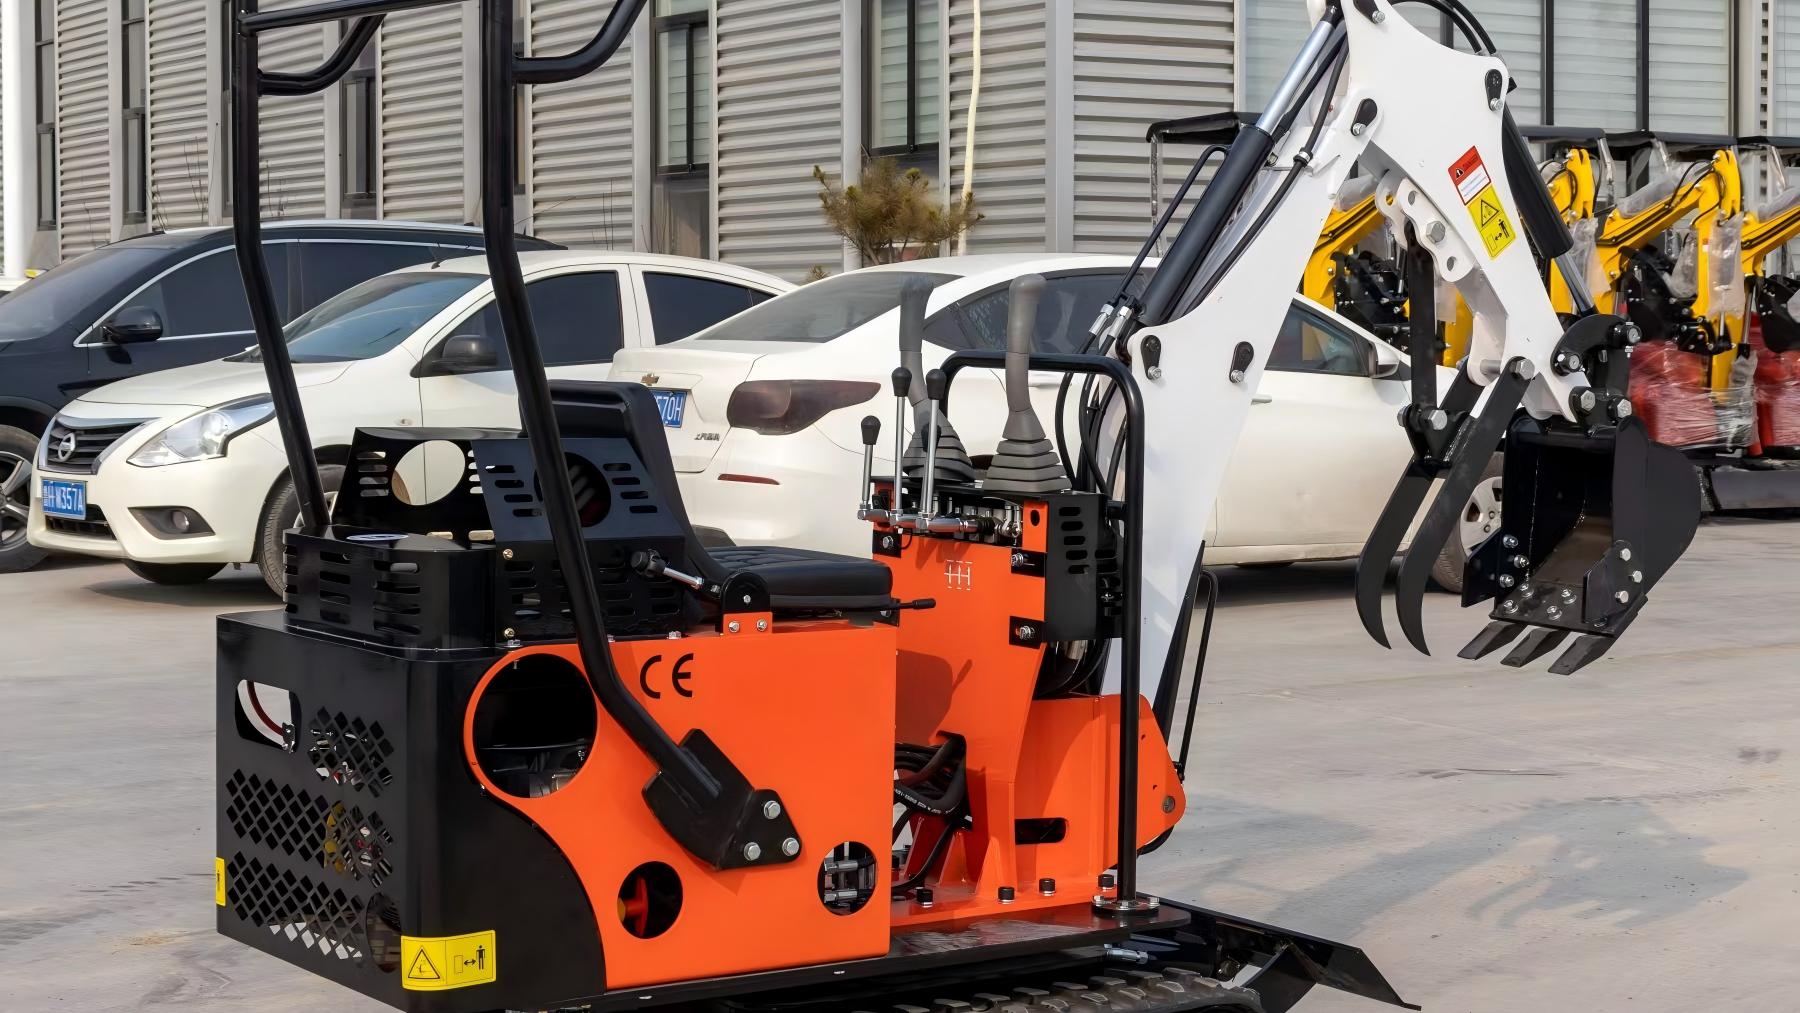
Cab/Operator Station: Houses the controls, seat, and often a display panel.
Boom, Arm, and Bucket: The primary digging components. The boom is attached to the house, the arm extends from the boom, and the bucket is at the end of the arm.
Hydraulic System: Powers all the moving parts. Understanding the hydraulic flow and pressure is key to smooth operation.
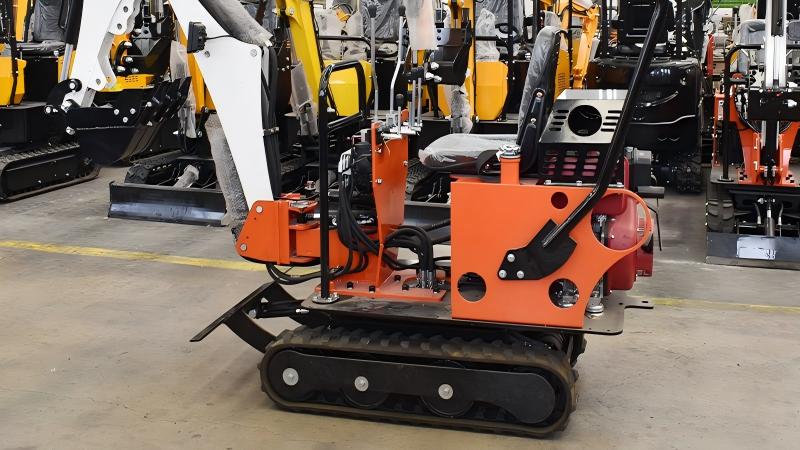
Undercarriage (Tracks or Wheels): Provides mobility. Tracks offer better traction and lower ground pressure, while wheels are faster on hard surfaces.
Dozer Blade: A front-mounted blade used for backfilling, grading, and stabilization.
Engine: The power source, typically diesel.
Controls: Joysticks (typically two), foot pedals, switches for various functions (e.g., boom swing, auxiliary hydraulics).
Key Specifications to Note:
Operating Weight: Influences stability and transport requirements.
Digging Depth & Reach: Critical for task assessment.
Bucket Capacity: Determines material volume per scoop.
Auxiliary Hydraulic Flow: Important for power attachments like hammers or augers.
Pre-Operation Checks and Safety Protocols
Safety is paramount when operating any heavy machinery. A thorough pre-operation inspection and adherence to safety guidelines are non-negotiable.
Pre-Operation Checklist:
Walk-Around Inspection: Check for visible damage, leaks (oil, fuel, hydraulic fluid), loose hoses, or missing components.
Fluid Levels: Verify engine oil, hydraulic fluid, coolant, and fuel levels are adequate.
Tracks/Tires: Inspect tracks for proper tension and damage; check tire pressure on wheeled models.
Attachment Security: Ensure the bucket or any other attachment is securely pinned and locked.
Hydraulic Lines: Look for kinks, chafing, or leaks in hydraulic hoses.
Lighting & Alarms: Test all lights, horn, and backup alarm.
Safety Features: Confirm safety interlocks (e.g., control lockout levers) are functional.
Operator's Manual: Always have the machine-specific operator's manual accessible and review it.
Safety Protocols:
Personal Protective Equipment (PPE): Always wear a hard hat, safety glasses, high-visibility clothing, safety-toed boots, and hearing protection
Site Assessment: Before starting, survey the work area for overhead obstacles (power lines, tree branches), underground utilities (pipes, cables – call 811 before you dig!), uneven terrain, slopes, and potential hazards.
Clear Work Zone: Ensure no personnel or obstacles are within the swing radius or travel path of the excavator. Use spotters if visibility is limited.
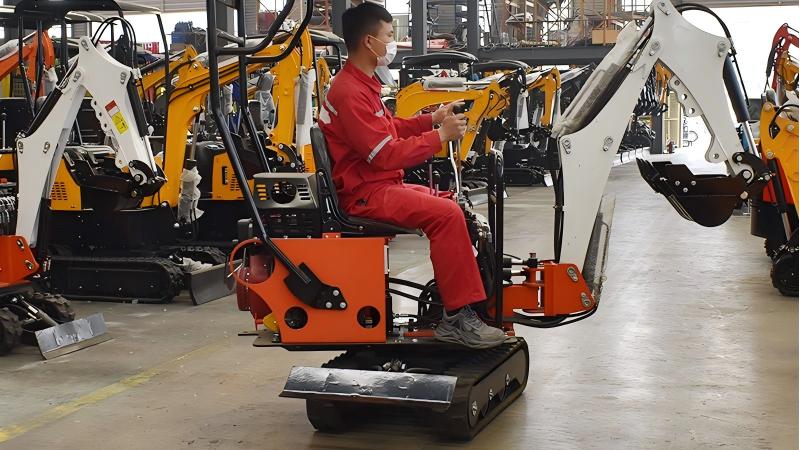
Mounting/Dismounting: Always maintain three points of contact (two hands, one foot or two feet, one hand) when entering or exiting the cab.
Never Operate Under Influence: Do not operate machinery while fatigued or under the influence of drugs or alcohol.
Stabilize the Machine: Use the dozer blade to stabilize the excavator before digging, especially on slopes.
Know Your Load: Never exceed the machine's lifting capacity. Consult load charts if available.
Understanding the Controls
Mini excavators primarily use two joysticks for the digging functions, foot pedals for travel, and various switches for auxiliary functions. Control patterns can vary (e.g., ISO or SAE), so always confirm the pattern before operating.
Typical Control Layout (ISO Pattern is common):
Left Joystick:
Forward/Backward: Controls the boom (up/down).
Left/Right: Controls the house swing (left/right).
Right Joystick:
Forward/Backward: Controls the arm (in/out).
Left/Right: Controls the bucket (curl/dump).
Foot Pedals:
Left Pedal: Controls the left track/wheel forward/backward.
Right Pedal: Controls the right track/wheel forward/backward. (Pushing both forward/backward for straight travel).
Dozer Blade Lever: Usually a separate lever or button to control the dozer blade (up/down).
Auxiliary Hydraulic Controls: Buttons or foot pedals to operate hydraulic attachments.
Throttle: Controls engine RPM for power.
Safety Lockout Lever: A crucial lever that disables hydraulic functions when raised, preventing accidental movement.
Familiarization Exercise (Engine Off): Sit in the cab with the engine off and safety lockout engaged. Gently manipulate each control to understand its range of motion and what it would do. This builds muscle memory without the machine moving.
4. Starting and Basic Operation
Once pre-checks are complete and you understand the controls:
Enter the Cab: Using three points of contact.
Adjust Seat and Seatbelt: Ensure you are comfortable and secure.
Engage Safety Lockout: Ensure it is engaged (controls disabled).
Start Engine: Follow the manufacturer's specific starting procedure. Allow the engine to warm up.
Disengage Safety Lockout: Lower the lockout lever to enable hydraulic controls.
Low Idle Practice:
Travel: Gently push both travel pedals forward to move straight. Practice turning by pushing one pedal more than the other, or pushing one forward and the other backward for spin turns.
Dozer Blade: Practice raising and lowering the dozer blade.
Boom/Arm/Bucket: At a low throttle, gently manipulate the joysticks to move the boom up/down, arm in/out, and bucket curl/dump. Focus on smooth, coordinated movements.
Swing: Practice swinging the house left and right.
Digging Techniques
Effective digging involves coordinating multiple functions.
Positioning: Position the excavator so the digging area is within optimal reach and swing radius. Use the dozer blade down for stability.
Trenching:
Start by extending the boom and arm out, with the bucket slightly curled.
Lower the bucket to the desired depth.
As you pull the arm in, simultaneously curl the bucket to fill it.
Once full, lift the boom slightly, swing to the spoil pile, and dump the material by pushing the bucket control forward.
Return to the trench and repeat.
Tip: For straight trenches, use the side of the bucket to clean the trench walls as you go. Consider using a trenching bucket for narrower, deeper cuts.
Loading:
Position the excavator so the truck or spoil pile is within easy swing range.
Dig a full bucket as described above
Swing smoothly over the truck.
Open the bucket cleanly, avoiding spilling material on the truck cab.
Return for the next scoop.
Leveling/Grading (with Dozer Blade):
Lower the dozer blade to the desired depth.
Travel slowly forward, pushing material.
Adjust the blade depth as needed to achieve a smooth grade.
For fine grading, use the bucket in a "dragging" motion with the arm slightly extended, skimming the surface.
Working on Slopes
Operating on slopes significantly increases risk.
Travel: Always travel up and down slopes with the heavier end (usually the boom and bucket) pointing uphill for stability. Keep the dozer blade on the downhill side.
Digging: When digging on a slope, ensure the dozer blade is deployed downhill for maximum stability. Dig cautiously, being aware of the machine's center of gravity.
Side Slopes: Avoid traveling or digging on extreme side slopes. If unavoidable, keep the boom and arm tucked in low, towards the uphill side.
Attaching and Operating Attachments
Mini excavators gain immense versatility from attachments.
Attachment Procedure:
Position the machine on a flat, stable surface.
Carefully align the quick coupler or pin points with the attachment.
Engage the hydraulic pins (if applicable) or manually insert and secure pins.
Connect hydraulic lines for powered attachments, ensuring they are clean and correctly matched (pressure/return).
Test the attachment's function at a low throttle before full operation.
Specific Attachments:
Hydraulic Hammer: Requires careful control to avoid damage to the machine or object. Use short, consistent bursts.
Auger: Apply consistent downward pressure and rotate slowly to prevent stalling. Clear spoils regularly.
Grapple/Thumb: Excellent for material handling and demolition. Practice precise control for grasping objects.
Shutting Down the Machine
Proper shutdown procedures ensure longevity and safety.
Park on Level Ground: If possible, park on a flat, stable surface.
Lower Attachments: Lower the bucket or attachment to the ground.
Retract Cylinders: Fully retract all hydraulic cylinders (arm in, bucket curled) to protect them from damage and weather.
Dozer Blade: Lower the dozer blade to the ground.
Engage Safety Lockout: Raise the safety lockout lever to disable controls.
Reduce RPM: Bring the engine to a low idle.
Engine Off: Turn off the engine following manufacturer guidelines.
Secure Machine: Remove the key, lock the cab, and block the tracks/wheels if parking on a slope.
Conclusion
Operating a mini excavator is a skill that develops with practice and a steadfast adherence to safety. By thoroughly understanding your machine, conducting rigorous pre-operation checks, mastering the controls, and applying proper digging and material handling techniques, you can operate a mini excavator efficiently, productively, and, most importantly, safely. Always prioritize training, continuous learning, and situational awareness to become a proficient and responsible operator.
Post time:Sep-25-2020
